Creating an Access Key
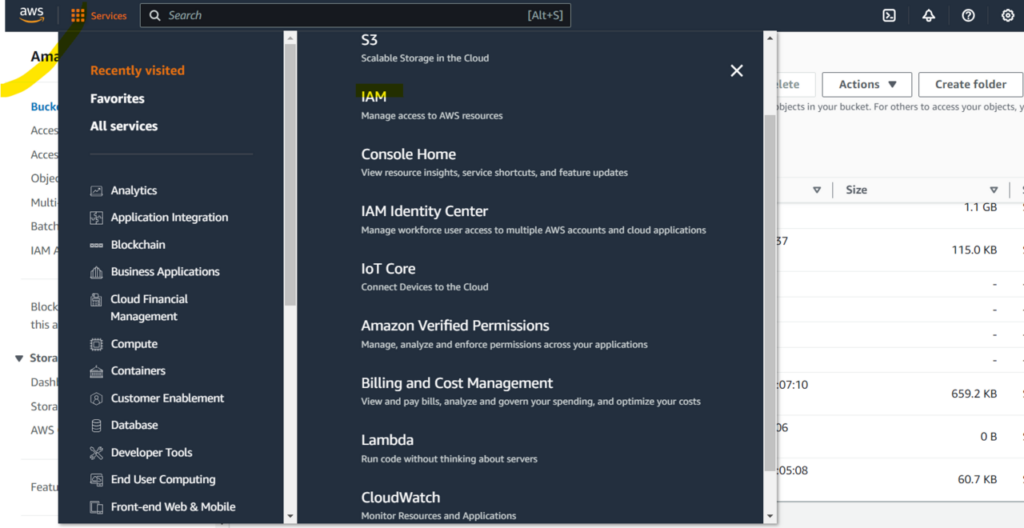
Step 1: Log in to AWS as the Root User. Go to Services > IAM.
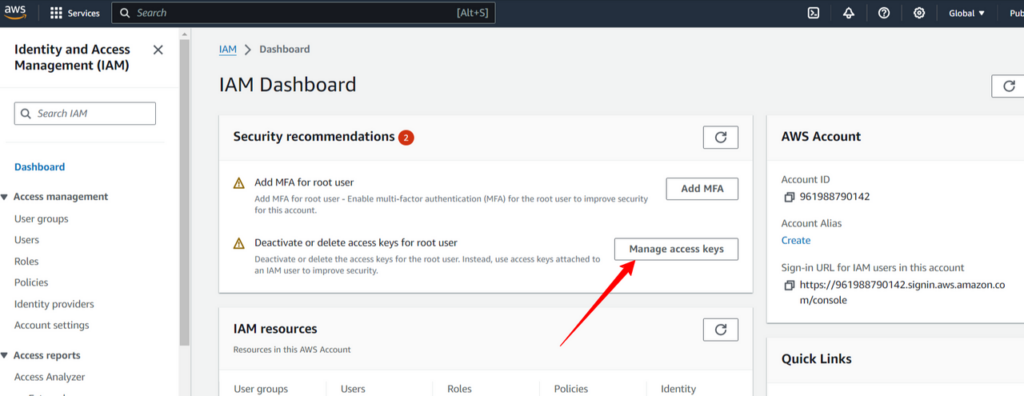
Step 2: Click Manage access key.
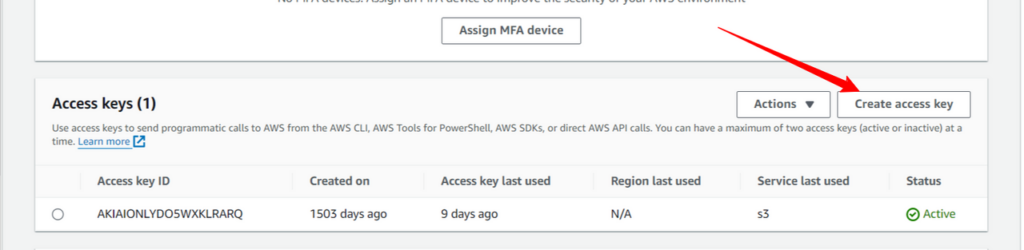
Step 3: Click Create access key.
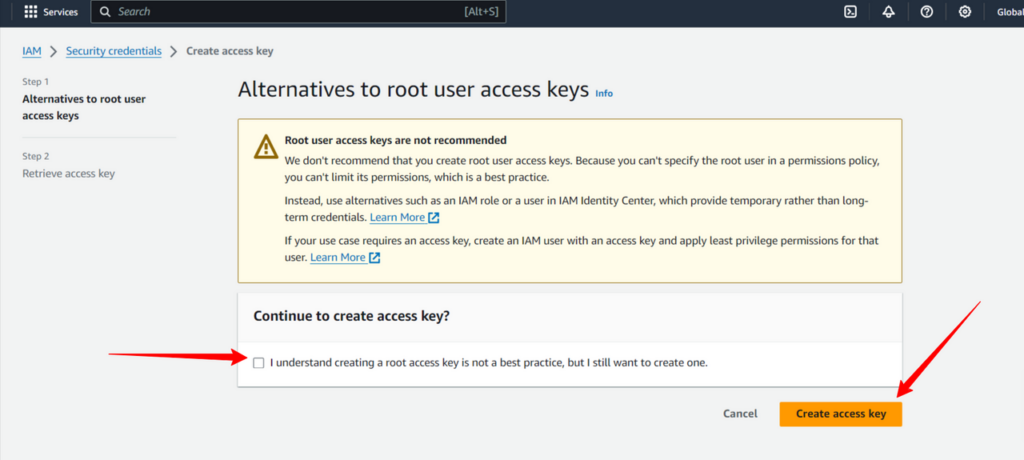
Step 4: Click that you understand and Create access key.
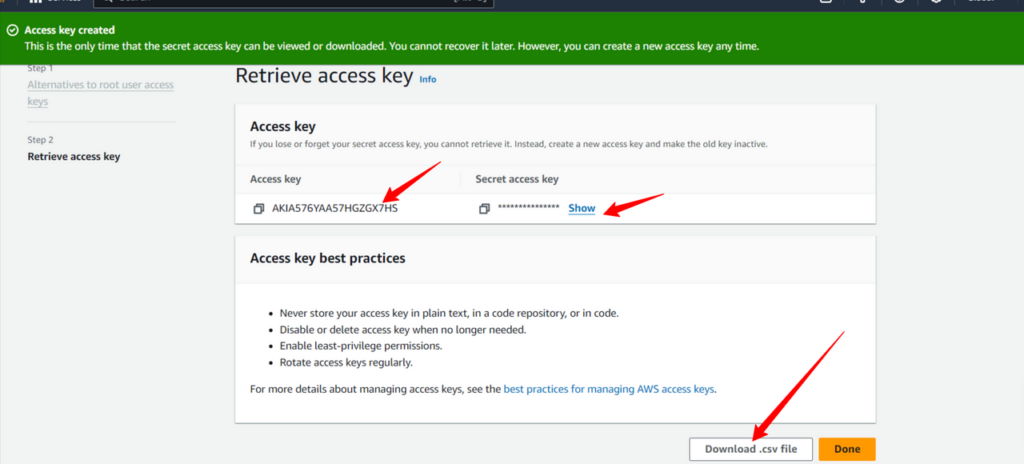
Step 5: Copy your Access Key and Secret Key or download them.
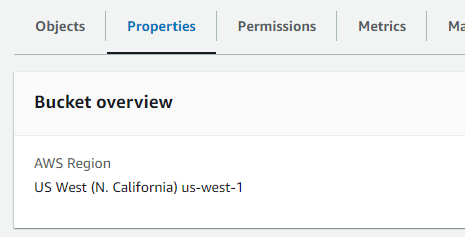
Step 6: The last detail you’ll need is the AWS Region for your bucket. You can specify the region when you create the bucket. If you already have a bucket, work your way back to your bucket page, click Properties and you’ll see the Region. Copy the full, exact text for the region.
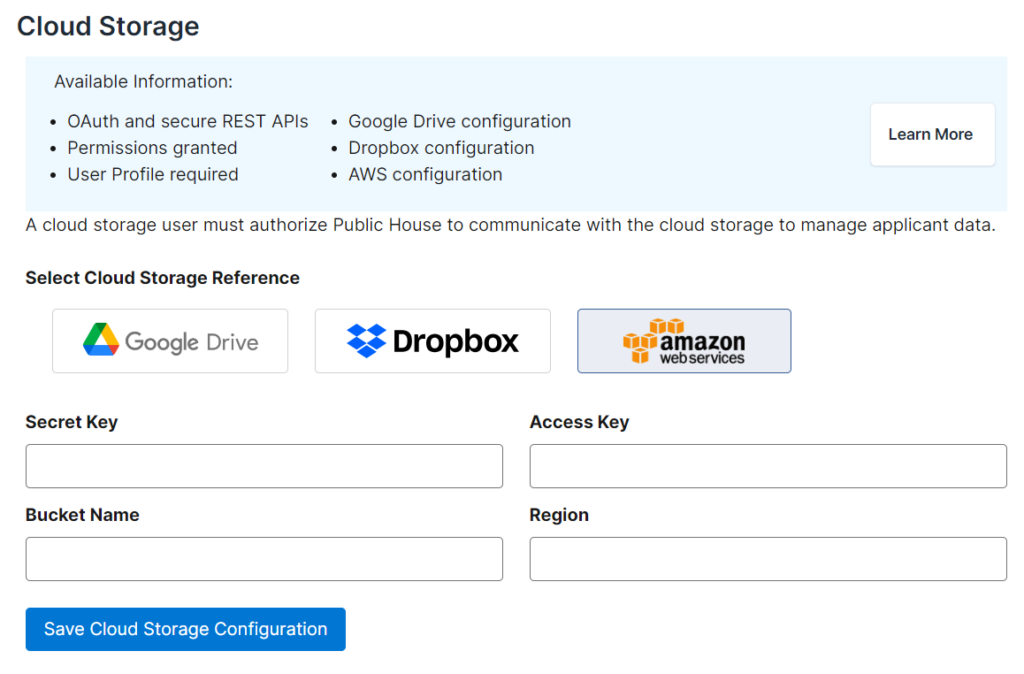
Step 7: In Salesforce, go to the App Launcher and search for Public House. Go to PH Setup > Cloud Storage > Modify Cloud Storage. Select AWS as your cloud storage reference and paste in your Secret Key, Access Key, Bucket Name and Region.
That’s it!